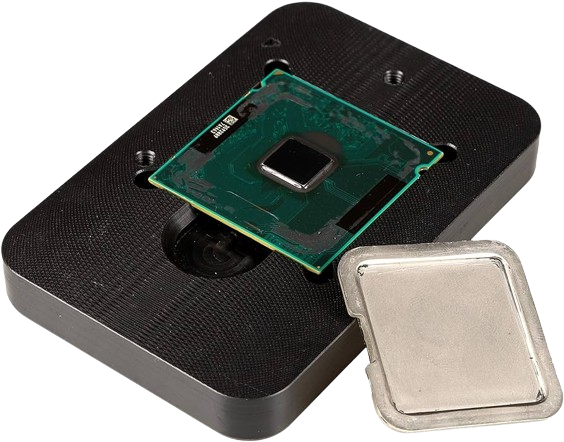
Why Delid?
We understand the frustrations that come with aging hardware, especially when your trusty motherboard can’t keep up with the latest CPU releases. It’s a common scenario: you’ve invested in a high-performance GPU, but your older CPU just can’t keep pace, leading to frustrating bottlenecks and subpar gaming experiences.
But fear not! Delidding is the solution you’ve been searching for. Instead of shelling out for an entirely new motherboard and CPU combo, delidding offers a cost-effective alternative to breathe new life into your existing setup. By carefully removing the integrated heat spreader (IHS) from your CPU and replacing the stock thermal compound with a superior one, you can unlock improved thermal performance and potentially unleash higher overclocking capabilities.
What’s more, delidding isn’t just about squeezing every last drop of performance from your CPU—it’s also about sustainability. Rather than discarding perfectly functional hardware due to compatibility issues with newer CPU generations, delidding allows you to extend the lifespan of your setup while minimizing electronic waste.
So whether you’re a hardcore overclocker seeking to push your CPU to its limits or a budget-conscious gamer looking to maximize performance without breaking the bank, Delidded CPUs is here to help you achieve your goals. Say goodbye to bottlenecking woes and hello to a smoother, more responsive gaming experience with delidding.
What Do I Need?
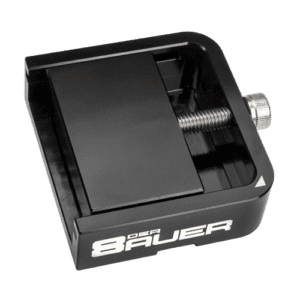
Popping off your first heatsink is by no means a simple task. For this you’ll need a quality delidding tool. These tools are designed to carefully pry open the CPU package, allowing access to the CPU die underneath. By removing the heatsink, you can apply better TIM directly onto the CPU die, improving conductivity and lowering temperatures for higher stable overclocks.
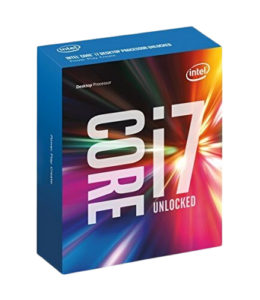
If you’re diving into delidding, you’re probably a serious gamer hungry for every ounce of performance, wielding a beastly CPU, or perhaps a savvy PC-builder aiming to squeeze every last drop of power from your setup without breaking the bank. No matter your approach, we highly recommend opting for the top-of-the-line unlocked CPU compatible with your socket type for an unparalleled gaming experience.
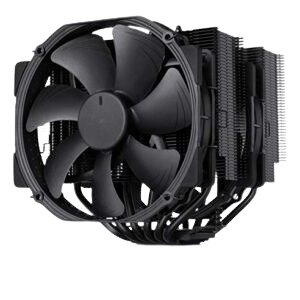
If you’re into overclocking, you know the deal – stock coolers won’t cut it. But fear not! Delidding your CPU can slash those temps by a whopping 20 degrees Celsius. To really push the limits, though, you’ll need a top-notch cooler that can provide a high stable overclock. Think high-end air coolers or mid-to-high range AIO coolers for maximum performance.
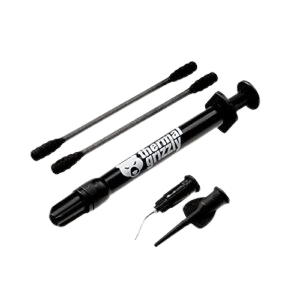
When it comes to delidding your CPU for max performance, you gotta use the good stuff! Thermal Grizzly Conductonaut or Coollaboratory Liquid Ultra are the go-to choices for serious enthusiasts. These bad boys are all about top-notch thermal conductivity. Check out stuff like application techniques, electrical properties (super crucial for CPUs with exposed dies), and long-term reliability
What's The Process?
Step 1 - Delid the CPU
- Place the CPU into your delidding tool, ensuring the correct orientation. Usually a small triangular arrow will denote this.
- Close up the delidding tool and tighten until you feel movement from the IHS.
- Slowly undo the bolts securing the CPU into the device and reopen the tool.
Step 2 - Remove the IHS
- Carefully lift the IHS off the center of the CPU.
- Use a blunt knife or razor blade to carefully separate the IHS from the CPU.
- Be cautious not to scratch the surfaces.
Step 3 - Clean the Surfaces
- Use contact cleaner to remove any old thermal interface material (TIM) from both the IHS and the CPU die.
- Ensure both surfaces are free from debris and contaminants.
Step 4 - Insulate Sensitive Areas
- Identify any sensitive components near the CPU die, such as resistors.
- Apply nail polish or silicon insulators to these components to prevent short circuits from conductive liquid metal.
Step 5 - Prepare the IHS
- Use a washing-up sponge or similar abrasive material to clean any remaining adhesive from the IHS.
- Polish the surface of the IHS to a mirror finish to improve thermal conductivity.
- Create small channels in the copper surface to facilitate the flow of liquid metal.
Step 6 - Apply Liquid Metal
- Apply a small amount of liquid metal to the surface of the CPU die. Spread it evenly using small circular movements until you achieve a mirror finish.
- Apply liquid metal to the center of the IHS in a rectangular segment. Ensure the coverage aligns with the CPU die area, avoiding sensitive components.
Step 7 - Reattach the IHS
- Carefully align the IHS over the CPU die, ensuring proper orientation.
- Apply a thin layer of silicon glue around the edges of the IHS to secure it in place.
- Use the delidding tool again to ensure precise placement. Secure the IHS in place with the provided clamp, applying gentle pressure.
Step 8 - Final Checks
- Check for any excess liquid metal or glue.
- Ensure the CPU orientation is correct.
- Remove any excess glue that may have leaked out from under the IHS.
- Allow the glue to dry for at least five minutes before proceeding to install in your PC.
Top Tips
Not every CPU is overclock-friendly, so pay attention! AMD users generally have it good – many chips are ready to overclock. Just keep an eye out for outliers like the first-gen Ryzen 7 5800X3D. If you’re team Intel, go for a K-series chip for straightforward frequency boosts. But keep in mind, every chip’s overclocking potential varies thanks to the silicon lottery – microscopic variations in the silicon wafer from which they are made.
Don’t forget about fine-tuning those in-game settings to keep your CPU in check! While high texture details and effects mainly stress your GPU, settings like ray-tracing, resolution, and field of view put extra weight on your CPU. If you’ve got a shiny new card with AI upscaling, go for the performance mode instead of maxing out details. It’s all about cramming in those extra frames for smoother gameplay rather than obsessing over every pixel!


